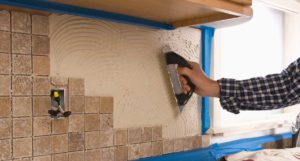
Kitchen tiling
If you are planning to fit / replace tiles in your home, below is some advice when thinking about a kitchen tiling job. Here are some ideas on what you should do and what not to do while putting up tiles in your home.
DO’s.
1. Accurately measure the area to be tiled.
The trick here is to measure the area accurately so you can estimate the quantity of tiles needed. Usually, you will add an extra 10% to allow for reasonable wastage. The packaging for your new tiles will give you a square metre coverage per box.
2. Collect the tools and materials you will need.
You can go online to find the tools that you’ll need. If you are unsure, you can contact me for a bit of advice.
3. Think about the best tiles to use for the job.
If you’re planning to install floor tiles in your bathroom then buy tiles that come with a no-slip feature. However, it’s not so important if you’re doing a kitchen tiling or backsplashes. For kitchen tiling, polished tiles will be a better option, the options for creativity are enormous! You can use a nice contrasting grout between joints to pick out the outline of your new tiles. Again the options are endless.
Do take your time here in selecting your new tiles, you might want to match the grout and surrounding cupboards. You might want to contrast between floors in nearby rooms to clearly define your newly tiles floor.
4. Use tile spacers
Tile spacers are small plastic crosses which help retain in place your tiles as the cement cures. They also ensure regular spacing between tiles vertically and horizontally

DON’TS
1. Don’t Step on or grout tiles before the grout / adhesive has fully set
Normally, after putting up your tiles, you will Want to leave 24 hours or at least overnight before grouting. For floor tiles then at least 24 hours before walking on them. A bit of patience here will save much upset from tiles that move or crack. You really don’t want to have to hack off the new tiles and start over again!
2. Don’t forget tile sealant for pours floor tiles.
One spot of fat or grease on new porous tiles will be almost impossible to remove and will be a ‘feature’ of your new floor for life. Get porous tiles sealed as soon as possible. Normal ceramic wall tiles don’t require sealing in this way.
3. Don’t skimp on preparation.
Prep is EVERYTHING! For an outstanding finish, you need a smooth, dry, dust free surface ready to take an even coating of adhesive and then tiles carefully placed using spacers to keep the joints. Fill the odd hole, remove any old tile cement, brush down to remove loose bits of tile and cement and you are on your way to a top finish.
Apply your grout between tiled joints and silicone between any tiles and wood. This will allow for some flex and still maintain the integrity of the sealed joint.
Of course, if you are not too sure about all this, then call in a skilled person to do the job for you…
